I love to have fun with paper, food, paint, music and events and just being creative in all of it. However, I don't feel the need to be a perfectionist nor a professional in any of my creations. I wish I could have a blog JUST about the art of cooking, photography, sewing, art, mothering, jewelry making, card making, dancing, gardening, deep spiritual thoughts, decorating, poetry, party planning, baking.... and the list goes on but I can't. I don't think I was created with the ability to focus on one task. I like all of these hobbies layed out before me and the freedom to pick whatever I choose depending on the mood or time I have.

Monday, October 31, 2011

Chocolate Ganache filled Cupcakes w/ Creamy Peanut Butter Frosting

What to do with left over Chocolate Cake mix?  Yes, you read correctly I love my cake mix boxes! Though I do make cake from scratch sometimes I prefer the easier road and doctoring up my cake mix box to my liking. 
The problem with having left over desserts in my house is that they are continously calling my name everytime I enter the kitchen or pass by the kitchen or upstairs in my room, or out in the patio.  Everywhere I hear "Mari, come and eat me".  So much temptation not enough will power. 

Well I did it anyways I made Chocolate Ganache filled Cupcakes with Creamy Peanut Butter Frosting. It's literally a mouth full!

Ingredients:
Chocolate Cake mix box or your favorite from scratch cake recipe
16oz container of sourcream
2 eggs
1/4 cp Canola Oil or melted butter

Peanut Butter Frosting:
1/4 cp Peanut Butter
4oz Cream Cheese
2cps Powdered Sugar

Ganache:
4oz Semi sweet Chocolate chopped
1/4cp of Heavy Cream or milk
3tbl Peanut butter

1. Mix all of the ingredients above for cupcakes. Follow the directions on box for cupcakes. Use cupcake liners or spray tin with cooking spray.
2. Mix all of the Frosting ingredients together and mix well.
3. In a small saucepan mix the Ganache ingredients. Start with milk first and let it almost reach a boil constantly stirring. Then remove from heat and add chocolate and PB.  Stir until it's a smooth consistency.  Let it sit. 
4. Make a hole in each cupcake and then pour in chocolate ganache into each hole.  For a fluffy frosting put frosting in a pastry bag and sqeeze onto cupcakes. 
Optional: Top with crushed reeces pb cups or 1/2 a pb cup.
Let cool in fridge for 15min.
Oh so yummy! 
Picture is from Baking is Hot

Saturday, October 29, 2011

Guest Blogging at Nifty Thrify Things

I am absolutely positively beside myself to be guest blogging at Nifty Thrify Things.  Vanessa lined up some great Guest bloggers while on vacation and she was sweet enough to include me in that line of wonderful bloggers!

Hop on over and visit!


No Sew Captain Hook Costume using a Tee

Nothing like last minute work to get your creative juices flowing.  My boys request this morning was "I want a Captain Hook costume & Peter Pan costume."  Yes, of course this request is coming the day before our party and on top of that tonight I have a baby shower that I am helping throw.

Our attempt!
What you need is a T-shirt your willing to cut up or you can use a polo.
You can leave the sleeves on but for us it worked better to make it a sleeveless coat.
Then you will need Glue, Gold ribbon, Black ribbon and Black felt for the bottom trim.  I glued on all of this to the polo. 
1. I used the black felt for the bottom part of Captain hooks coat. And added this first.
2. Then I added the black ribbon around the edges where I cut down the middle. This gave it a more clean look and it covered up the raw edges.
3. Next I added gold ribbon and glued it over the black felt and the t-shirt.
 This part was so easy it took about 20min.

The hat was alot harder for me. I used the template from The Hive. It worked great except my son is 7 and has a lot of hair so her template was too small for my boy.  I had to guess at measurements. I had already messed up my other sons, Peter Pan hat and had to redo it so I was trying to avoid redoing this one. It was still slightly too small but it will work.

You will need black felt, glue and chalk.  I followed  her directions for the template and used chalk to draw it on first. 

Then I cut it out and glued both pieces together.  She sews them but I had no time for sewing and this worked just fine.


Saturday, October 22, 2011

Dollar Store Xmas Tree Skirt turned Pretty


Nothing like cascading ruffles to save a cheap $1 felt Christmas Tree Skirt. 


This post has been moved to my new blog Inspired by Familia!  You can click here to get the full details on how to make your own no sew xmas tree skirt.


Visit Inspired by Family for other great Christmas Ideas for the home and Fab DIY Gifts & Stocking Stuffers!


Mango Chicken Salad in Tortilla Bowls

I love these tortilla bowls. They are so easy to make and they look like you spent a lot of time in the kitchen on dinner, when in actuality you didn't.
 Bowls
4 flour tortillas
1/2teaspoon ground cumin
1/2teaspoon salt
Salad
4 cps cubed or shredded chicken
1.5 cps diced and peeled mango
1tbl fresh lime juice
1.5 cps diced peeled avocado
1/2 cp chopped red bell pepper
1/2 cp chopped red onion
1/4cp of chopped fresh cilantro
1 cp shredded  lettuce
1/2tsp salt
Vinaigrette
2 tbl mango nectar
1tbl white wine vinegar
1 tbl fresh lime juice
1 tbl fresh orange juice
1 tbl honey
1/3 cp Canola Oil
Directions:
1 Heat oven to 400°F. Use cooking spray and put on tortillas.  Sprinkle cumin and 1/2 teaspoon salt evenly over sprayed sides of tortillas. Press tortillas, seasoned sides up, in bowls and place in oven 5 to 7 min or until semi crispy. Mine above were just folded into a cone and put into ramekins.
2 In food processor bowl with metal blade or blender, place all vinaigrette ingredients except oil. Cover; process until smooth. With food processor running, slowly pour oil through feed tube until mixture is thickened. Set aside.
3 In large bowl, mix chicken, mango, lime juice, avocado and remaining ingredients. 
4. To serve, spoon chicken salad into tortilla bowls. (Bowls will be full.) Serve immediately.
This recipe was adapted from the Pilsbury Bake Off submission by Frances Pietsch.

Friday, October 21, 2011

Family Fun Games

Need some Family Fun that doesn't involve a computer, TV or even a board game?
Just like the good ol days, well not really but you get the point.


Here are some fun games our kids LOVE to play for our weekly Family nite or should I say our Wannabe Weekly Family Nite. Some weeknites it just ain't happening.:
Pass the Story Bag Game- Grab a bag and fill it with random objects that are around your house.  The youngest person starts by pulling out an object out of the bag (w/o peeking) and they Start the story but they don't finish it. They pass the bag when they are done with their part and the next member of the family continues the story. For example, 1st person "I was climbing a tree and a I saw a HUGE diaper running down the street" next person continues the story "The diaper couldn't run very fast because it was full of marshmallows" and so on, the last person ends that story.  You can keep it going with the same objects and have a different member start the storyline. Or each object can start a new story.

Mr/Ms. Waffley Maffley can I come to your house?- Choose who is going to be Mr/Ms. Waffley Maffley.  They sit on one side of the room and then the rest of the family sits on the otherside.  Everyone else on the otherside takes turns asking "Mr/Ms. Waffley Maffley can I come to your house?"  Then Mr/Ms. Waffley Maffley replies with "You may come to my house, if you .........." They have the family member do something and the person does it the command as they walk to the otherside and sit with Wafflley Maffley.  For example, you can have them dance like a ballerina, speak in a loud voice, skip, shake their booty, make a funny face etc.... Our kids love to watch us act silly!

Imagination Hide n Seek - This is a great dinner table game.  Pick one person to be the hider the rest of the family are the seekers.  You ask the hider to imagine somewhere in the house (not outside of the house) that they are going to hide, find the spot and don't tell anyone.  The rest of the family takes turns guessing where they think the hider hid. The hider replies with yes or no until someone figures it out.  If it gets too complicated then we start asking for hints like your cold or hot to find out if we are close.  With our kids we have to set boundaries of where they can hide otherwise they pick places like inside so and so's nose. So we tell them they have to be realistic places someone can  hide.  Our kids are younger so we have had them tell one of the adults their secret hiding place so they don't keep changing it throughout the game.

Dessert Scavenger Hunt- On an index cards give them clues of where you are hiding the dessert and have them figure it out. If they are younger you can use string to help them track where the next place is at.

Inside 4 Square- Use masking tape to make the 4 squares in your living room or wherever you have a wide enough space.  You need at least 4 people if there are more they rotate in everytime a person misses. The object of the game is to only let it bounce once in your square and get it into another square w/o touching the lines.  Assign one of the squares to be the Toilet which is where the person who is out goes.

Reenact an old nursery rhyme, Aesop fable or their favorite book- This is great for those stories your kids know by heart. They can draw the main characters on a sheet of paper and tape it on to popsicle sticks or they can use socks for puppets or real puppets. Or have them act it out.

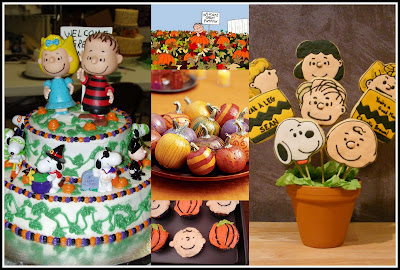
Charlie Brown and The Great Pumpkin Patch Party

Isn't this a fabulous theme for a Halloween Party!
As a kid, every holiday I would wait for ABC to air the next Charlie Brown Holiday special.  I loved Charlie Brown I was even Snoopy one Halloween.
Here is my Inspiration board I can't wait to see how the party turns out!

 
from Nancy's Cake Gallery, Sunset.com, Cakecentral.com

Caramel Apple Dipping Station
Why bob for apples when you can dip them!

picture from Maddycakes Muse

 
Picture from Passionate Wishes

Decor

Color scheme: Orange, Green, Purple & Black
Orange Fans piled up against each other on the wall hanging over dessert table

Thursday, October 20, 2011

Friday Link Ups

http://www.fingerprintsonthefridge.com/
http://thirtyhandmadedays.com/

Worlds Colliding Cheesy Potato Soup

I love when my worlds collide in the kitchen.  So I grew up in the U.S. I was born in Mexico and I live in Ecuador married to a Georgia Southern man.

This soup is a smorgasbord of all those roots. Ecuador has a Potato soup called Locro de Papa which you see in this recipe with the Achiote, feta, mozzarella and avocado.  My Mexican roots with the garlic, cilantro and onions and coating the potatoes with this  first. And my husbands Southern roots with the bacon and heavy cream. Gotta have that bacon in any vegetable dish if your cooking Southern food, right.


Ingredients
10 medium sized potatoes chopped
1 white onion, diced
4 slices of bacon
2 garlic cloves, minced
2 stalks of celery
3 tsp cumin
1 tsp achiote powder (optional)
6 cups of chicken broth
1 cup of heavy cream or more
1 cup grated or crumbled cheese (mozzarella or monterey jack)
1 cup of instant mashed potato mix
1 bushel of cilantro finely chopped
Salt to taste
Top: 1 cup of feta cheese crumbled
Avocados, sliced or diced

1.In a large pot cook bacon slices.
2. Then remove the bacon and add the onions, garlic, cumin, celery and achiote powder. Cook, stirring frequently, until the onions are tender, about 5 minutes.
3.Add the potatoes to the pot and mix until they are coated thoroughly. Continue cooking for about 5 minutes, stirring a every couple of minutes.
4.Add the broth and bring to boil, cook until the potatoes are very tender. Mash the potatoes in the pot, but don’t mash all of them.
5.Turn the heat down to low, stir in the cream, cook for about 5 more minutes. You can add milk if the soup is too thick. Then add the instant mashed potato mix.
6.Add the grated cheese and cilantro, mix well, and remove from the heat.
Serve and top with feta! Ecuadorians also top it with avocado slices, it's really good with avocado!

Picture from the Examiner.com

Wednesday, October 19, 2011

Fudge Ripple Turtle Brownies

Fudge Ripple Turtle Brownies
Plain chocolate bar, cake, brownies I am not a big fan of but add caramel, ganache, nuts to it and you can't stop me from nibbling.


Ingredients
1/2 cup butter
3 ounces unsweetened chocolate, coarsely chopped
1 cup sugar
2 eggs
1 teaspoon vanilla
2/3 cup all-purpose flour
1/4 teaspoon baking soda
1 cup chopped pecans, toasted
3/4 cup semisweet chocolate pieces
20 vanilla caramels, unwrapped
1 tablespoon milk

1. In a medium saucepan, melt and stir butter and unsweetened chocolate over low heat until smooth. Remove from heat; cool.


2. Preheat oven to 350 degrees F. Line an 8x8x2-inch baking pan with foil, extending the foil over the edges of pan. Grease foil; set aside. So glad they said to add foil clean up was really easy as a result.

3. Stir the sugar into the cooled chocolate mixture in saucepan. Add the eggs, one at a time, beating with a wooden spoon just until combined. Stir in the vanilla.

4. In a small bowl, stir together the flour and baking soda. Add flour mixture to chocolate mixture, stirring just until combined. Stir in 1/2 cup of the pecans and 1/2 cup of the chocolate pieces. Spread batter evenly in the prepared pan.

5. Bake in the preheated oven for 30 minutes. Cool in pan on a wire rack.

6. Meanwhile, in a small saucepan, melt and stir caramels and milk over medium-low heat until smooth. Spread over cooled brownies. Sprinkle with the remaining 1/2 cup pecans.

7. In a small saucepan, melt the remaining 1/4 cup chocolate pieces over low heat, stirring constantly until melted and smooth. Drizzle over the top. Let stand for 2 hours before serving.

8. Using the edges of the foil, lift the uncut brownies out of the pan. Cut into bars just before serving. Makes 16 brownies

Recipe and Picture from BHG

Tuesday, October 18, 2011

Need a Chuckle?

This picture made me laugh when I saw it on Pinterest it brought back many memories from my childhood.
Not to mention run and jump into your bed so the monster laying under it won't reach out and grab your feet.  Or figure out a way to turn the light switch off without having to get out of your bed. 

Cowboy Birthday Party

Isn't every little boys dream to be a cowboy! That was the case for my boys.

I love how Dandee-Designs used hankerchiefs to decorate and these priceless sock horses!

Games:
Roping
Use a hoola hoop and wrap tweed or thick rope around it and a rocking horse. Probably best not to have a child sitting in it, just saying.

Make your own cowboy vest station: We precut the vest on butcher paper and had crayons, markers, glue and Sheriff sticker badges that I made to place on them.

Photo Op- I made with butcher paper and painted on the cowboy.

Horse Races

Treasure in the sand- The kids loved this little station. Some spent pretty much their whole time here. When all dug up it was a farm with animals and barn.

Old Town created from boxes from That Village House
Horseback riding of course! Renting ponies in the states is a popular thing to do for birthday parties. When I decided to have a Western themed party here in Ecuador I didn't think twice about renting horses.  Well, it was pretty  much impossible b/c apparently people don't do that here, clowns are the party entertainment here. I called tons of places here and everyone acted like I was asking for something ridiculous like renting a lion. Finally, I found a taker for only $40 for an hour (yea cheap) and our boys and guest were happy and impressed because we didn't have clowns we had HORSES.

Food: As a Latina it is hard to have a party and not feed a meal to our guest.  That is how I grew up. You come to our house you leave full. The hardest part is finding the balance of providing a meal but not one where you spend all your time preparing while guest are there. Finding something that is easy, good and stress free. 
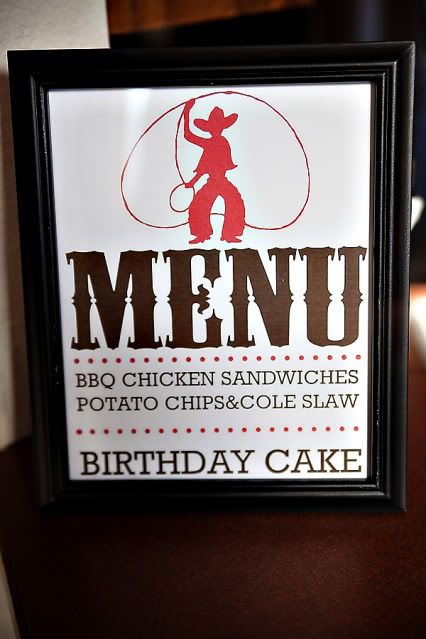
Photobucket
Kara's Party Ideas came up with this cute sign.  We made our BBQ in the crockpot which kept it warm and crockpot cooking is always stress free.
Cowboy Barnyard Birthday Party Ideas


What a fun way to serve drinks from Dulce Design

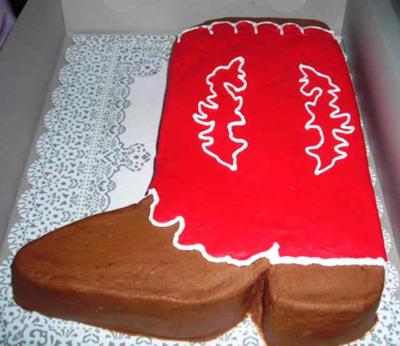
And most importantly THE Birthday cake!
    
from Easy Birthday Cakes


Pumpkin Butter Mini Pancakes


Mini anything is cute! Great for a party, brunch, Christmas brunch with the familia or just for Tuesday morning breakfast!

Ingredients:
Favorite Pancake Mix
Pumpkin Butter see recipe
Syrup
Circle cookie cutter
toothpick/skewer

1. Follow directions for your pancake mix and cook.
2. Once cooked use your small circle cutter to go around the pancake and get as many circles out of the pancake.
3. In between each stack spread Pumpkin butter.
4. Stack 3 together

Top with Pumpkin Butter and Syrup and skewer it!

Sunday, October 16, 2011

Monday Link Ups

See here

Salted Caramel Sweet Square Starbucks Wannabe!

Love at first bite!  While visiting the states this summer my good friend treated me to a little something something from Starbucks. A major treat because yea get this NO STARBUCKS here! I know feel sad for me. My pick was one of their Petites that are outrageoulsy priced but, oh so good.
When I got back home I was determined to figure out how to make these.  I think I have come close.

Salted caramel and chocolate filling with a layer of crisp pretzels and pecans on top of a shortbread crust.
Even though it has a lot of steps it's really easy.

Shortbread
1 1/2 cups all-purpose flour
1/4 cup sugar
12 tbl or 1.5 sticks of unsalted butter
1.5tsp Vanilla extract
for Caramel:
1 (14-ounce) can sweetened condensed milk
4 tbl light corn syrup
12 tbl unsalted butter

or I prefer
1cp store bought caramel (the kind for apples)
2-3 tbl of milk or heavy cream
for Chocolate
12 ounces semisweet chocolate
shortening optional

2cp of slightly broken up pieces of pretzels
1 cp of chopped pecans

Yup, there are 5 layers!
1st Layer- Shortbread
1. Preheat the oven to 325 degrees.
2. Put the flour and sugar into a bowl and rub in 12 tablespoons of the butter, form a ball.
3. Press shortbread mixture into a 9-inch square pan that has been greased smooth it with hands covered in plastic, otherwise it will constantly stick to your fingers. Poke with a fork and cook for 5 minutes, then lower the oven to 300 degrees, and cook for a further 30-40 minutes until it is pale golden and no longer doughy. This docking, as it’s called, will allow steam to escape during the baking, and keep your shortbread from bubbling up in patches. Let it cool in the pan.
2nd Layer- Pecans
 Put chopped pecans evenly over shortbread
3rd Layer -Caramel
In a small sauce pan, melt the remaining butter (12 tablespoons) for 2-3 minutes, then add the condensed milk and syrup. Whisk the mixture well until the butter is thoroughly incorporated.
Be careful to stir often. It’s ready when it’s thickened and turned a light golden brown. Pour this molten toffee evenly over the cooled shortbread and leave it to set.

If your using the store bought caramel (my preference) over low heat put caramel and milk in a saucepan and mix until smooth; constantly stirring. If its still too thick add the 3rd tbl of milk. Pour over shortbread and leave it to set.
4th Layer-Pretzels
Once caramel has cooled down put slightly broken up pieces of pretzels all over the top.
5th Layer- Chocolate
Break the chocolate into pieces and melt it in a bowl in the microwave.  Pour and spread it over the caramel mixture.


2 in 1 Ship and Toy Storage Bin

All you need is an Action Packer or other storage bin that is durable, thick rope, wooden stick or bamboo torch light, fabric for flag and sharpie.  My boys just move their toys around and hop in it.

Our boys room reveal here. So excited to be done, well for now.

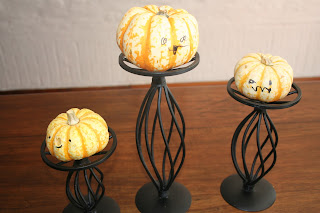
Bronze Pumpkin Candle Holders

My children with a sharpie and unsupervised is a dangerous thing!

I was planning on decoupaging these pumpkins using napkins but couldn't find the right print I wanted to go on them so I decided to paint them bronze and gut the top so I can insert a candle on them.


Supplies:

Bronze paint or Gold and brown mixed together
knife
tea candles


Pumpkin Pie Shake

nos·tal·gi·a (n -st l j , n -). n. 1. A bittersweet longing for things, persons, or situations of the past. 2. The condition of being homesick; homesickness. ...


This best describes my feelings every year around this time of the year since we moved to South America 4years ago. Here they don't even have Fall as a season I know so sad because it's my favorite time of the year (and Xmas).  Since I am missing all things Fall I thought I would saturate my house with the colors and goodness of Fall including baking in my kitchen.
 
This is my Fall color scheme in our home: I love the soft blue green with the toasty orange!

Trees here don't really turn colors but we have this one little tree that has red leaves all year long.  A sweet gift from God to have it in my very own front yard!
Sunflowers are really inexpensive here I got 6 large full flowers for $3.
Bronze painted pumpkin candle holders!
I couldn't figure out if I wanted it in a bowl or on the candle holders?

Now for the Fall comfort drinks
pumpkin pie shake
Pumpkin Pie Shake
Picture & Recipe from Super Healthy Kids
■1 cup plain or vanilla yogurt


■1 cup pumpkin puree

■1 tsp pumpkin pie spice (recipe at end of this pumpkin post)

■1/2 tsp vanilla

■1 TBL brown sugar (or other sweetener)

■7-10 Ice cubes

Blend all ingredients in a blender and blend until smooth!

Or Homemade Apple cider to warm your insides!
hot cider
Simple Hot Apple Cider
recipe and picture from Making This Home
3 parts apple juice*
1 part water
cinnamon stick
ginger, thin slice (optional)
lemon zest, several thin slices (optional)
several whole cloves – too many makes it bitter (optional)
1. Pour juice and water into a tall pot with a lid and turn on heat to high. You can see that a lot of the ingredients are entirely optional. We like it that way because then we’re not limited to making cider only when we have everything at home.
2. Prepare spices and add to pot. We put everything but the cinnamon stick in a tea infuser. Otherwise, you have to strain the cider or pick out small chunks one by one.
3. When pot reaches a boil, turn to the lowest setting. Let simmer about 15 minutes. Add thin slices of lemon for decoration if desired.
4. Remove infuser. Ladle into mugs and enjoy.
*When picking out apple juice, read the label and try to get juice without added sugar
Melamine dishes from Target
Global Table Setting
I love the blue in with the orange and brown hues.
Centerpiece of pumpkins covered with mums

Another fun centerpiece!

Last 2 pictures are from BHG